If you have clean Installed Windows 8 on a new PC then activation might be a troublesome job. This case arises for two reasons when you are trying to activate Windows 8 on a new PC, using a key that you already used on other PC earlier. Another event when its likely to get an error is during applying an upgrade key to a fresh Windows 8 installation. Now, lets see in details what are these errors. How to identify and make an approach to solve them.
This post is the 3rd major problem that I faced after Installing Windows 8. Below is the sequence of events that I faced while Clean Installing Windows 8 on new PC which was pre-installed with Windows 8 OEM.
- Create Windows 8 USB Bootable Pendrive for UEFI Boot.
- Solve Windows 8 Clean Installation Product Key Do Not Match Problem.
- Error 0xC004C008: Cannot Activate Windows 8 Using Already Owned Serial Key on new PC.
- Dual Boot Windows 8 With Ubuntu 12.10 in UEFI Boot Mode.
- Just after Installation of Windows 8, connect it to internet and check whether its activated or not.
Windows 8 Fresh Installation Activation Errors
Commonly encountered Windows 8 activation error codes are:
- Error 0xC004F061
- Error 0xC004C008
Error Code 0xC004F061
Error Code 0xC004F061 states “You upgraded to Windows 8, but didn’t have a previous version of Windows installed“. If you encounter this error it means, you have purchased an upgrade key but you have entered it on a fresh Windows 8 installation.
The official solution to this problem is to install the base OS first and then upgrade it to Windows 8. For instance, if you had upgraded from Windows 7 ultimate then for a clean installation, first you have to install Windows 7 then again upgrade it to Windows 8 using your upgrade key.
Solution in Forum
While searching for a solution to this problem, I found it after digging
Microsoft Support Forum. Follow the steps given below.
- Run the registry editor. press WIN+R then type regedit.
- Navigate to the following Key entery: HKEY_LOCAL_MACHINE\SOFTWARE\Microsoft\Windows\CurrentVersion\Setup\OOBE.
- Change the value for ‘MediaBootInstall‘ from 1 to 0.
- Open an elevated command prompt. This can be done by opening command prompt as admin.
- Run the command: slmgr -rearm.
- Reboot system.
- I have not tried this trick personally as I did not face this activation error. Many of the forum people have confirmed that this trick works.
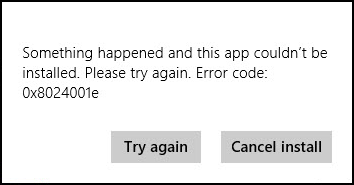
Error Code 0xC004C008
Error Code 0xC004C008 states “One copy of Windows might have been installed on multiple PCs“. Well, this is the problem I faced. Logically it’s explainable that the product key we are buying is only meant to be used on one PC. At the same time there are few things that don’t go well with the logic. To understand this, lets take a look at the things I did to reach the destination Error 0xC004C008.
- Bought a new laptop and completely removed Windows 8 from old one by clean installation of Windows 7.
- Performed clean Installation of Windows 8 Pro with my Previous genuine product key.
- After Clean installation of Windows 8, found it was not activated.
What is the solution to Error 0xC004C008?
Practically, I haven’t found any solution yet! But there are few things that you can try to get back your activation.
- Disconnect Internet and try Phone Activation.
- Call Microsoft Customer Care and let them know the trouble you are facing.
My Experience performing the above steps
Phone Activation didn’t work. After entering all the details, I always got to heard the same automated error ” Technical error, Please try Later”. Gave up hope and tried to call Customer Care.
Well, that’s another painful experience worth half a day’s time. Called them nearly 20 times out of which 3 were attended and once had complete conversation without disconnecting. The customer service directly told that I need to install previous Windows first and then upgrade to Windows 8. But this was not my real problem. I tried to tell them my error code still there was no positive response. So it was clear that they are not even trying to help, except practicing their parrot speech. Particular Representative was even not sure about the upgrade Prices.
Above was the call in which I had a complete conversation. In the previous call attempt, told the same things to the customer care representative, she asked for my serial key and was on the way to give me phone activation (or whatever) but the call went blank, though I was in full coverage area. From the call experience I have 2 questions for Microsoft:
- How can 2 different Customer Care Representative say 2 different things, when my problem is the same! ?
- Before the Customer Care Representative starts the conversation, they collect our details along with phone n.o. Why the hell do you collect phone numbers if you cannot call back when a call has abruptly ended between an important conversation?
After this I didn’t have enough stamina left to call again and test my luck. Tried the same product key on my old laptop again after performing a Windows 8 clean installation and it worked like a charm.
What Actions can take away Windows 8 Activation?
- If you are using Windows 8 on 1 PC then forever you have to use it on the same PC.
- Even upgrading the hardware of a PC might take away Windows 8 activation (according to many users on MS forum).
- Fresh Formatting a new PC with OEM Windows8. Many manufacturers are not providing Windows 8 installation Disk.
At this moment, I can only say that situations are not that favorable for an authentic Windows 8 user. After investing your hard earned money you wont like to get restricted by simple things like this. Obviously this goes for a user who loves to try different things on his PC. For a basic user its OK, as they may prefer being stable without performing any stunts, for instance, trying to full format Hard disk and remove recovery partitions.
Do let us know if you successfully solved Error 0xC004C008 and activated your copy of Windows 8 PRO.